Sunday, December 13, 2009

SID filtering

An administrator in a trusted domain can modify the SID history for a user, which could grant her elevated privileges in the trusting domain. To prevent this from happening you can enable SID Filtering for a trust. When SID filtering is enabled, the only SIDs that are used as part of a user's token are from those domains in the trust path of the trusted domains. if the trusted domain is dns-info.blogspot.com which has a child domain called child.dns-info.blogspot.com, SID Filtering would accept SIDs from both the dns-info.blogspot.com.com domain and its child domain.

Sunday, March 1, 2009

Change SOA Record

The following illustrates on how to change SOA record.

1. Assume the domain is "myrootdns2003.com" and dns server is "dnssserver2003".
2. Open dns using the command dnsmgmt.msc.
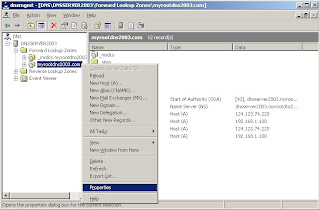
3. In the console tree, browse to dns zone "myrootdns2003.com", right click on it and select properties.
4. In dns zone properties dialog, go to "Start Of Authority(SOA)" tab, enter the FQDN of primary dns server "dnsserver2003", responsible person and serial number as shown below.
5. Thus changes the SOA record on domain controller.

Create SRV record

Service (SRV) record. Allows administrators to use several servers for a single DNS domain, to easily move a TCP/IP service from one host to another host with administration, and to designate some service provider hosts as primary servers for a service and other hosts as backups. DNS clients that use a SRV-type query ask for a specific TCP/IP service and protocol mapped to a specific DNS domain and receive the names of any available servers.

The following shows on how to create SRV record

1. Assume the dns server is "dnsserver2003" and dns zone to which the srv record to be added is "myrootdns2003.com"
2. Open dns management snap-in console using the command dnsmgmt.msc.
3. In the console tree, go to the dns zone "myrootdns2003.com", right click on it and select "other new records"
4. Select "Service Location (SRV)" in new resource record type dialog and click "Create Record" button.
5. Enter the SRV server details in new resource record dialog, and select "Allow any authenticated user to update all dns records with the same name" check box and click ok.
6. Thus creates new srv record.

Netdom - Verify Trust

It is often needed to verify a trust relationship, particularly external trust relationship, is working properly before using any cross domain network resources. To verify a trust on command line. do the following.


1. Assume the trusting and trusted domains are "myrootdns2003.com" and "myforesttest.com" respectively and passwords are "Mydns123" and "Myforest123".
2. Now run the below command to verify the external trust.


netdom trust myrootdns2003.com /domain:myforesttest.com
/userd:myforesttest\Administrator /Passwordd:Myforest123 /usero:myrootdns2003\Administrator /passwordo:Mydns123 /verify


3. To verify trust relationship between Active Directory based windows domain and non-windows realm kerberos domain (Assume the kerberos realm password is "Mytrust123"), run

netdom trust myrootdns2003.com /domain:myforesttest.com
/userd:myforesttest\Administrator /Passwordd:Myforest123 /usero:myrootdns2003\Administrator /passwordo:Mydns123 /verify /Passwordt:Mytrust123

reset trust relationship

When a trust relationship is broken, then it is necessary to reset the trust relationship. The following illustrates on how to reset a broken domain trust relationship.

1. Assume the trusting domain name is "myrootdns2003.com" and trusted domain is "myforesttest.com".
2. Open "Active Directory domains and trusts" Console diagram using the command "domain.msc".
3. Right click on domain node "myrootdns2003.com" and select properties.

4. In "myrootdns2003.com" properties dialog, select the domain "myforesttest.com" and click properties.
5. Click validate button in "myforesttest.com" properties dialog.
6. If validation fails, a dialog box comes to reset the trust relationship. Then follow up with the dialog box and complete the resetting.

netdom - reset trust

If a trust relationship between two domain is broken, then it is necessary to reset the trust. netdom.exe is a command tool which can be used to reset the trust. Follow the steps below to reset the trust.

1. Assume the trust exists between the domains "myrootdns2003.com" and "myforesttest.com". Passwords of both the domains are "Mydns123" and "Myforest123" respectively.
2. Now run the below command to reset trust.


netdom trust myrootdns2003.com /domain:myforesttest.com /userd:myforesttest\Administrator /passwordd:Myforest123 /usero:myrootdns2003\Administrator /passwordo:Mydns123 /reset


3. If the trust is between windows domain and non-windows realm (kerberos) , then run the below command to reset the trust,

netdom trust myrootdns2003.com /domain:myforesttest.com /userd:myforesttest\Administrator /passwordd:Myforest123 /usero:myrootdns2003\Administrator /passwordo:Mydns123 /reset /Passwordt:Mytrust123

Note, the passwordt has to be provided to reset the trust with Kerber0s realm.

Saturday, February 28, 2009

Register SRV Record

By Default, SRV records are automatically created one the domain controller is installed.
If srv records not found or invalid, try the following mitigation to manually register dns srv records.

1. Restart NetLogon server on domain controller (DC).
2. If step 1 fails, then run dcdiag /fix and check srv records are registered.
3. if both 1 and 2 fails, run netdiag /fix on domain controller.
4. if , 2 and 3 fails, then try manually editing netlogon.dns. i.e add srv record to netlogin.dns as shown below.
After editing the netlogon.dns file, reload the dns zone as shown below.

If none of the above works, still one can register srv records, by recreating dns zone. Follow the instructions shown below to recreate dns zone.

1. Assume the dns zone is "myrootdns2003.com"
2. Open dns management console using dnsmgmt.msc command.
3. In the dns console tree, go to forward lookup zones, right click on dns zone. "myrootdns2003.com" and click delete.

4.After deleting dns zone, right click on "forward lookup zones" and select "newzone" and follow the steps to recreate same dns zone. i.e dns zone with name "myrootdns2003.com"
5. while re creating new zone, “Allow Secure and Non Secure Dynamic updates" option in dynamic updates dialog.
6.Now restart netlogon service.
Design by infinityskins.blogspot